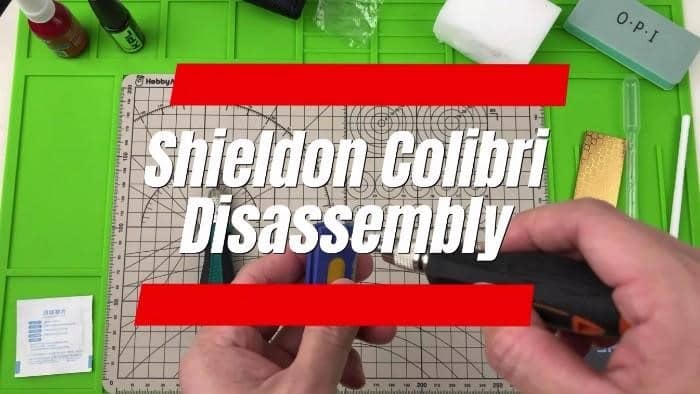
Shieldon’s Colibri is a revolutionary product that offers users a complete overview of the procedure from disassembly to the assembly of the device.
It features various advanced EDC knives and components designed to make the process simple and efficient, while also providing superior protection for self-defense.
With Shieldon’s comprehensive instructions and detailed diagrams, anyone can understand and see Colibri in just minutes!
Whether you’re a pro or an amateur knife enthusiast, this guide will provide everything you need to know about Colibri.
Let’s get started on our journey of discovering how to assemble the Shieldon Colibri with confidence!
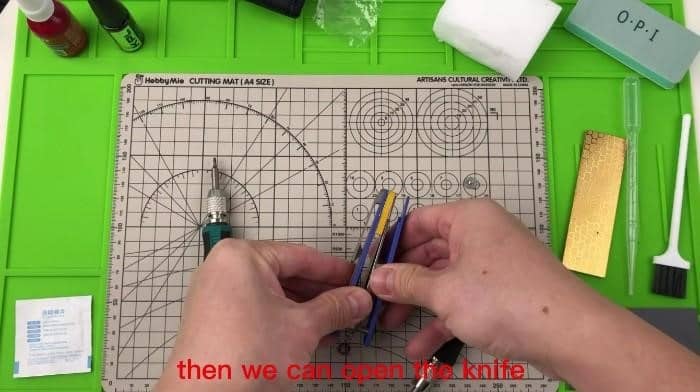
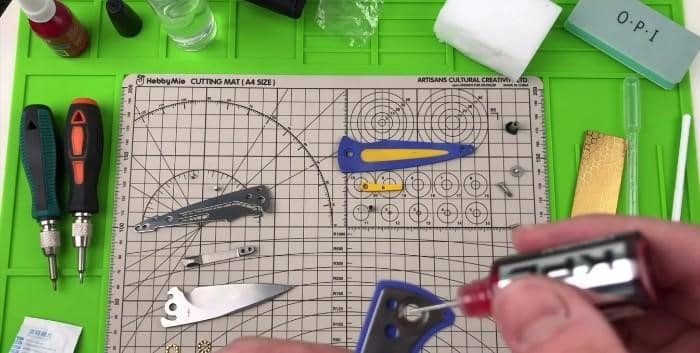
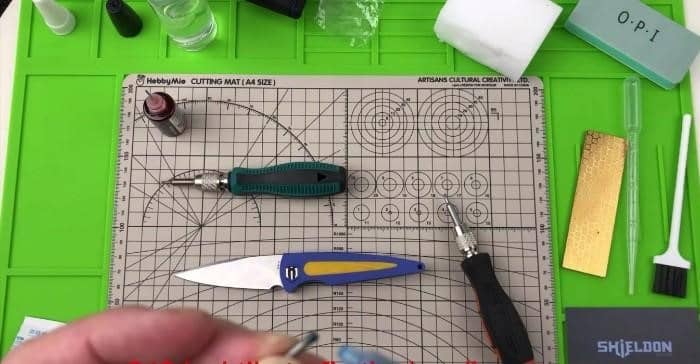
1 T8 Pivot Screw and Body Screw

Although most Shieldon buyers are familiar with disassembling and reassembling their own models, the Shieldon Colibri was designed with this in mind.
Let’s begin with the screw that holds the pivot in place, and then go on to the lone screw that holds the body together.
To T8 Screws placed in the surface

If you’re looking for ease of use, look no further than the Shieldon Colibri. It only takes two simple T8 screws to open the knife and start using it – a stark contrast from other knives that require up to six screws on their body before being taken apart!
We at Shieldon Knives understand how important convenience is for all our users, so we’ve designed our product with this in mind.
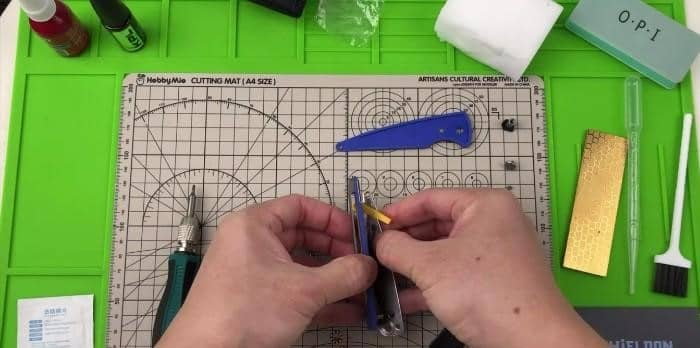
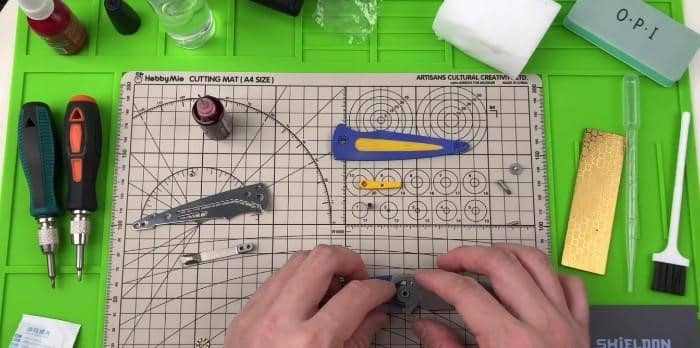
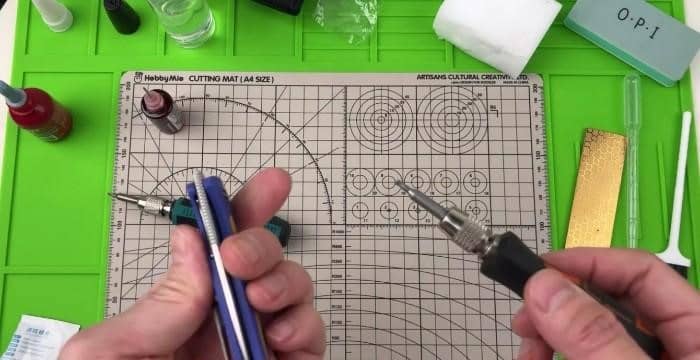
Opening of Colibri Knife
Taking apart the Shieldon Colibri is simple and uncomplicated, provided you handle its components with care.
Its unique pivot, a screw loop formation, allows for simple assembly while each part’s size is designed to fit perfectly together.
Even without an instruction manual or professional guidance, it won’t be difficult to understand how to put this knife back together – because all pieces were made with intent!
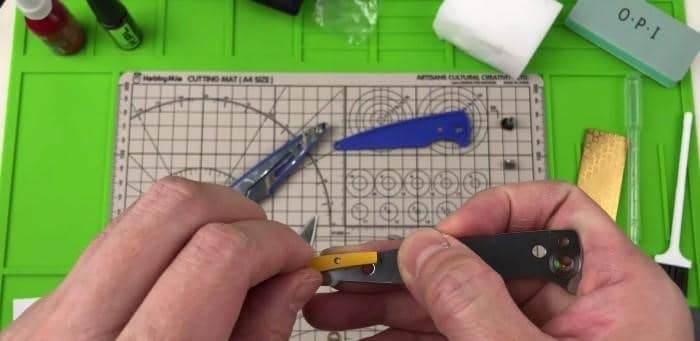
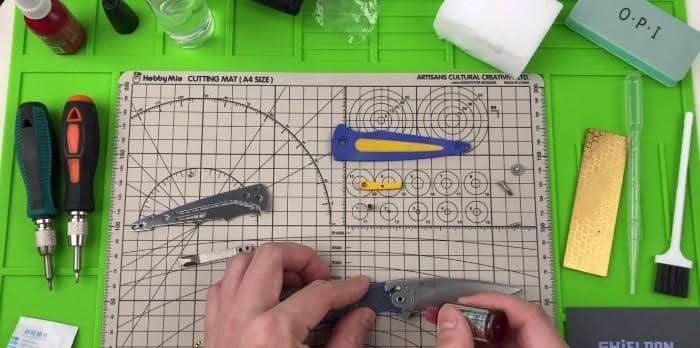
Separation of Components
Now, let us examine the inner workings of a Colibri bird.
Upon dissection, you can find organs like lungs, heart, stomach, and liver – much in the same way that uncovering two liners, a backspacer, stop pin, and ball bearing when separating a knife. In either case, there are several components to be discovered!
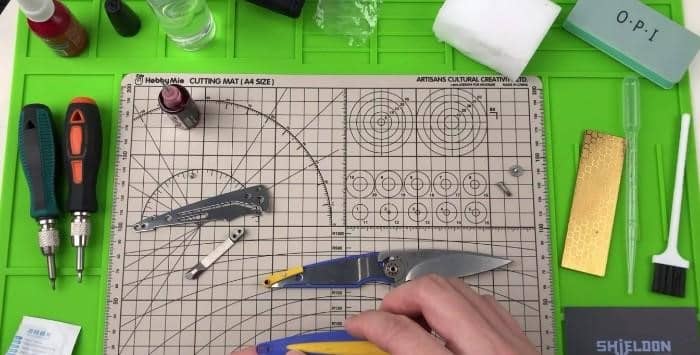
Backspacer color
You’ll notice the backspacer is a vibrant lemon G10. Meanwhile, the Cornflower Blue G10 on its scales reflects Ukraine’s colors—the home country of Colibri’s designer, Max Tkachuk!
Let us show him our appreciation by saluting him for this ingenious design!
Only 1 T6 Screw Placed inside the Knife
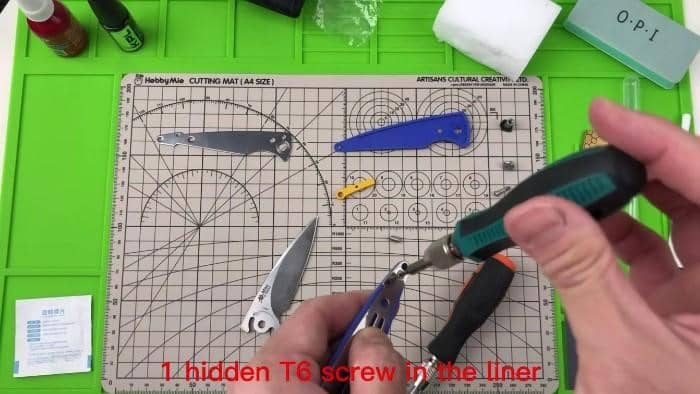
To eliminate the need for multiple screws on the surface and maintain a sleek, integrated look, we have tucked away one T6 screw inside the Colibri knife.
If you take it apart carefully, you’ll be able to find this hidden fastener- however, there is no requirement for tightening unless desired for cleaning purposes.
For accessorizing this particular screw properly with its compatible head size of T6, a specialized screwdriver will be necessary.
Titanium Milled Clip
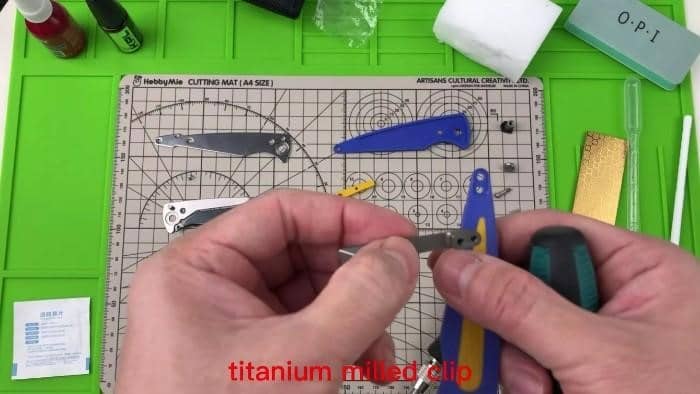
Let us explore the titanium milled clip.
As opposed to its stainless steel counterpart, this one is constructed from 6AL4V titanium alloy–also referred to as T4 titanium–comprised of 90% Titanium element and a combination of 6% aluminum and 4% Vanadium.
Additionally, it has been bead blasted for an enhanced aesthetic experience that perfectly complements the rest of Colibri’s design.
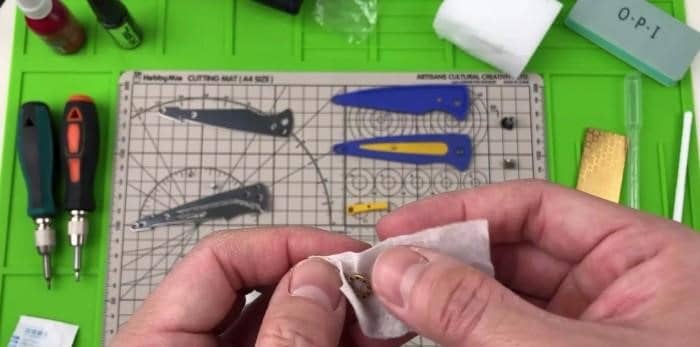
Cleaning of Components Before Reassembly
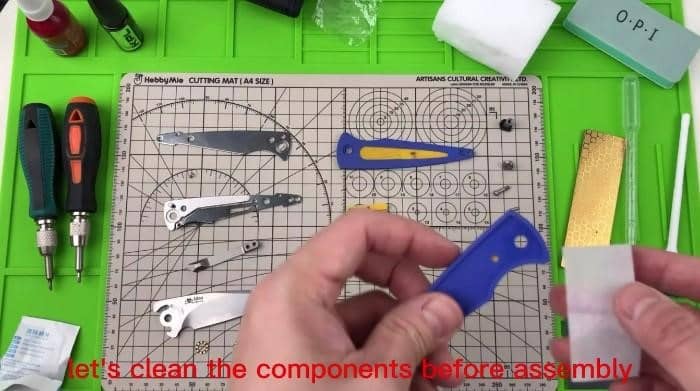
To start, we’ll take everything apart and clean each component individually before putting it back together. You won’t need a specialized liquid to clean the knife; water or alcohol will do just fine!
In this video, we typically use 75% alcohol for wiping down all of our parts.
Degreasing
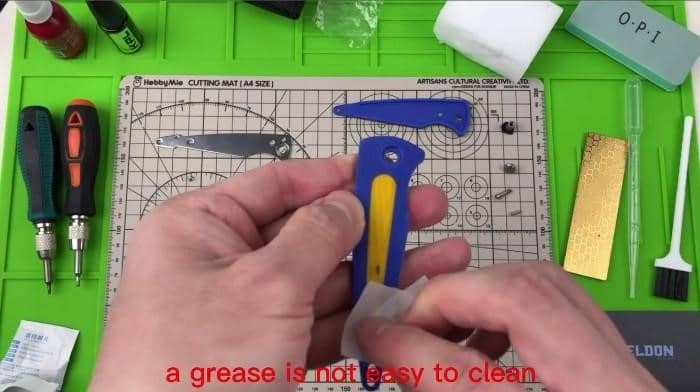
We have discovered a greasy residue on the G10 handle scale, which is not easily cleaned. To properly clean it, we will be utilizing degreasing water with extreme caution.
Tumbling Finish for the Liners
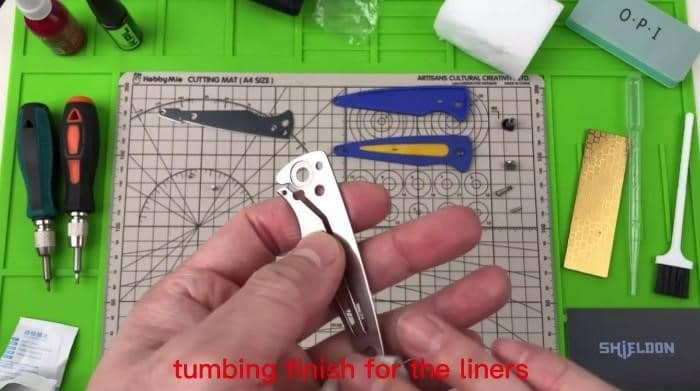
Our liners have a glossy finish from the tumbling process, resulting in smooth and shiny metal surfaces.
However, this method is rarely used on knife blades since food or other materials could stick to the blade when cutting.
Ceramic Detent Ball

To enhance the detent ball on the ceramic liner, we use a video to observe its progress.
This specialized process must reach at least 40% of the surface for optimal pressure and strength in both opening and closing; it cannot be adequately specified with words alone – production experience is paramount!
Stonewash Blade Finish
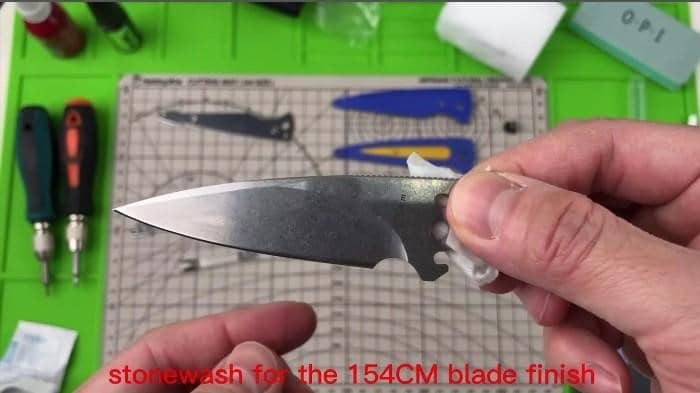
The blade is the knife’s main feature. Economy versions of this product line often use 154CM steel.
According to Shieldon Colibri designer Max Tkachuk’s specifications, the blade must have a stonewash finish.
The original blades are stonewashed by being rolled on a roller containing stones and lye. The size of the stone and the length of time it is rolled have no effect on the design.
The Shieldon Colibri undergoes a somewhat conventional stonewash.
Designer Logo
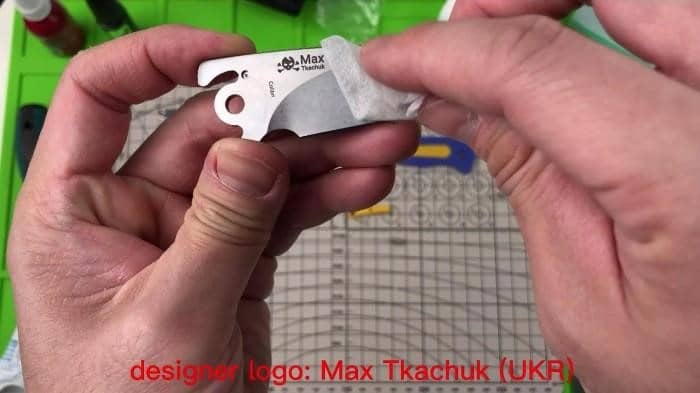
On the reverse side of the knife’s blade, a laser engraver has etched the brand name and designer’s initials.
The engraving may be seen when the blade is disassembled. As laser engraving often degrades the steel’s surface—which protects the steel from rustiness—the engraved blade is more likely to rust.
The engravement is wiped with anti-rust oil as soon as it is finished engraving to prevent rusting.
Caged ceramic balling
The caged ceramic ball bearing measures 9.7mm (0.38″) in diameter, the standard size for most applications.
However, dirt and debris can quickly accumulate over time and make detent stiffy when operating this type of bearing; it is thus important to regularly perform maintenance cleaning on your bearings to ensure they remain functional at all times.
Assembling the Colibri Knife again
Once the Colibri is properly cleaned, let the fun begin! Knife enthusiasts are sure to enjoy the process of assembling and disassembling their EDC knives.
This knife play will not only bring joy, but also provide a strong appreciation for your favorite blades.
Degreasing water
Before assembling the pivot, it is wise to lubricate it with a quality brand such as KPL (Knife Pivot Lubricator) for optimal protection.
This renowned product amongst knife enthusiasts facilitates smoother and more protected ball bearings.
It is recommended that you apply the lubricant at least four times total; two on each side of the bearing.
Stop pin for the blade
Don’t forget to insert the stop pin when fitting in the blade.
With larger knives, we usually conceal it within the pivot, although with Shieldon Colibri knives this is impossible due to their size; therefore leaving the stop pin exposed on its handle.
Lubricate the pivot
Moreover, we make sure that the pivot and detent ball trace are both adequately lubricated to ensure a smooth turning of the blade.
G10 colors
It’s time to finish the assembly of the Shieldon Colibri by placing its other handle scale on it, following your insertion of the blade and backspacer.
Soon enough, you’ll have a complete product!
Model 243 locktile for fixing the screw
For the singular T8 screw on the handle body, we employ 243 Locktile – a kind of epoxy that firmly holds it in place while still allowing for its removal.
This ensures secure fastening and reliable stability without compromising our ability to undo it later if needed.
Check the detent after the assembly
As the final step, you’ll need to adjust the pivot on your product very carefully by turning it with a T8 screwdriver.
Don’t make it too tight or else the blade won’t rotate properly; but also don’t leave it too loose or there may be rocking and wobbling of the blades when in operation.
You just have to keep testing until you find that perfect spot!
Final Thoughts
When you locate the precise placement of the pivot screw, your EDC knife is like new! I guarantee that you won’t be able to keep from using it. You can enjoy carrying it again with ease and confidence. If you appreciate this video, please show support by liking and sharing it with your peers.
To see more Shieldon Knives videos, subscribe on Shieldon、Facebook、Instagram、YouTube、Twitter、Tumblr、Pinterest page today!
Additionally, when purchasing a Shieldon Colibri on Amazon US use our 20% off coupon (EFD6D3YU) for maximum savings – thank you in advance for supporting us!
Original video https://youtu.be/dvH_8Re4qek: Shieldon Knives MT01A Colibri smart body on palm. small EDC blade, salute to designer’s nationality


